As all of these processes involve dealing with sharp blades (and dull blades which can in fact be more hazardous), exercise some care. No pointing the blade at your self, wear your safety goggles, and absolutely no keeping up the scissors.
There are lots of different methods to sharpen. Choose the method that works finest depending upon how damaged your blades are, and what you have on hand. Let's start with the quick fixes
How to Sharpen Scissors with Sandpaper
For this technique, use medium grit sandpaper. Cut the scissors into sandpaper a few times, turn the scissors over, and cut a few more times. Check the sharpness. If the blade isn't as slick as you 'd like, duplicate the procedure. As you can envision, the entire length of each blade needs to rub throughout the sandpaper to sharpen them totally.
How to Sharpen Scissors with Aluminum Foil
Like with sandpaper, sharpening with aluminum foil involves cutting into the foil consistently to remove burs and nicks from the blades. The aluminum foil requires to be folded over a couple of times and flattened before cutting. Additionally, you can use steel wool with the same approach.
What is the very best angle to sharpen scissors?
Constantly look carefully for the steepest cutting bevel and replicate it. The greatest angle discovered in family scissors will be 40 or 45 degrees. This is discovered on the finger blade of knife edge dressmaking shears, although the thumb blade might be at a lower angle, normally 15 degrees.
How to Sharpen Scissors Versus Another Things
You can utilize the shaft of a screwdriver to burnish the cutting edge. Open the scissors wide and close down like you're cutting, then move the scissors from the top to the idea on the metal shaft. Do this for both blades.
Additionally, you can utilize a mason jar or other glass container that you do not mind damaging. Open the scissors around the glass, and "cut" at the side of the container repeatedly, running the length of both blades versus the glass.
How to Sharpen Scissors with a Store-Bought Sharpener
Yep, you can buy sharpeners! Not just are they quite safe, but they're likewise extremely easy to use. You can utilize either a knife sharpener, or a specially-designed sharpener just for scissors.
Both sharpeners have their benefits and drawbacks. Knife sharpeners are nice to have in the house for the sheer reality that they can sharpen a wide variety of blades. Scissor sharpeners are safer to use as the blade is contained, plus they can sharpen both blades at the same time.
Utilize a Sharpening Stone for Razor Sharpness
You can get a sharpening stone at your local hardware shop. They can be found in a range of sizes as required for various blade lengths, and run in between $5-15 depending upon the size. The stone includes one coarse side and one great side. A new stone needs to be soaked in machine oil over night. It also needs to be kept in a closed container in between usages, and lightly oiled before each usage.
Here's how it works:
Action 1: Hold the sharp edge of one blade flat against the stone.
Action 2: Keep the blade as flat to the stone as possible, and hold the shears at an angle. Move the blade away from yourself while moving the blade from the tip to the end (i.e., when the blade is closest to you on the stone, you will be sharpening the tip; when the blade is farthest from you on the stone, you're sharpening scissors near where the screw sits). Do this a couple of times till the blade is sharp.
Action 3: Repeat steps 1-2 on the 2nd blade.
How To Use a Scissor Sharpening Service
Ok, possibly you simply don't wish to sharpen your blades yourself. Maybe you slouch? Or possibly you have lots and lots of scissors to refine. Either way, if this sounds like you, there's a solution: you can mail your scissors (and knives, and axes, etc.) in to a scissor sharpening service. Here are a few:
Sharpen By Mail - starting at $5 for household scissors, going up to $25 for professional blades.
WillSharpen - $9 for home shears, $20 for beauty/professional
SimplySharper - scissors, knives, clippers, etc. $5 - $21.
As you can see, all of these scissor sharpening services are useful if you do not have a place near you that can do it. You'll have to pay shipping on top of the service charge though. Just wish to know "exists scissor sharpening near me?" - here's an useful Google Maps link.
To keep your scissors preserved and have the sharpness last longer, it's finest to have different pairs for various tasks. For example, I have one set that just cuts material, and one set for everything else I require to cut in my life. Hopefully these pointers will help you get your scissors in great shape once again.
Used for cutting paper, cardboard, material, string, cost, plastic packaging-- that list goes on-- those scissors in your office or kitchen drawer might be the most trusted daily tool in your house. With such routine use, that reliable tool dulls in time. The majority of scissors are not prohibitively costly, so when one pair dulls you might consider simply going out and purchasing another. But of course that's not essential (not to mention a waste of loan) if you how to sharpen hair scissors. Essentially, scissors are 2 knives linked at a pivot point. So not surprisingly, you can sharpen scissors just as you would cooking area knives, with a number of basic tools and some practice.
To sharpen scissors most efficiently, you require a sharpening stone (in some cases called a bench stone). You can get one at the hardware store for less than $20, and it will serve to sharpen hair scissors most any blade you have, from your kitchen area knives to your pruning shears. We like the Lanksy Puck (view item on Amazon) for its compact size and easy to use shape, but you can't go wrong with any quality, two-sided stone.
If your scissors are really dull, you'll need to start with the coarse side and after that move to the finer side to complete. If your scissors just require a light tune-up, you'll use only the finer side.
Lay your sharpening stone on a towel and lubricate it with oil or water. Shops offer sharpening oil alongside sharpening stones, however you can utilize any oil, or even water, for lubrication.
Get rid of the screw that holds your scissors' blades together in order to deal with each one individually. It will be a lot easier to deal with them.Remove the screw that holds your scissors' blades together in order to deal with each one individually. It will be much easier to deal with them.
As discussed, if your scissors are especially dull, you'll wish to turn over your stone to work initially on the coarse side; if not, begin dealing with the finer side. Location the blade onto the stone with the diagonal edge facing you. Then, gripping the handle, tilt the blade toward you till the beveled edge lies flat on the stone. Now, gradually pull the blade across the stone to you, keeping that beveled edge flat versus the stone. Repeat this action-- carefully!-- till the blade has actually sharpened. If you started on the coarse side of the stone, finish with a few swipes on the finer side of the stone.
Till you're practiced, you might discover it tough to evaluate when the edge has been entirely sharpened. Here's a suggestion: Before beginning, run an irreversible marker throughout the blade edge. When the marker has actually vanished, you've sharpened the entire blade.As mentioned, if your scissors are particularly dull, you'll want to turn over your stone to work initially on the coarse side; if not, start dealing with the finer side. Location the blade onto the stone with the beveled edge facing you. Then, gripping the manage, tilt the blade toward you till the beveled edge lies flat on the stone. Now, gradually pull the blade throughout the stone to you, keeping that diagonal edge flat versus the stone. Repeat this action-- thoroughly!-- till the blade has sharpened. If you began on the coarse side of the stone, surface with a couple of swipes on the finer side of the stone.
Once you've ended up with the sharpening stone, you will see a fine edge of burrs along the blade; these requirement to be gotten rid of. Reassemble the scissors by screwing the blades back together, and open then shut them a few times. Knock the burrs off by making a few trial cuts through a piece of material those scissors are implied for, be it fabric or paper. If you're happy with how sharp the scissors are, you're completed. If not, repeat the procedure.
You must practice on some old scissors till you master it-- Grandma will seethe if you destroy her antique sewing scissors! However it won't take you long to get comfortable, and after that you'll never ever have dull scissors in the house once again. When you're familiar with how it's done, it's really no sweat to sharpen scissors and keep them sharp with quick, regular maintenance every number of months. Happy cutting!
Scissors are a cutting instrument including a pair of metal blades connected so that the blades meet and cut products located amongst them where are the manages are gathered. They are utilized for cutting many different products like sheet metal, paper, wire, fabric, rope or metal foil. There are a lot of types of scissors, and they're made to do various jobs.
2 finest tools for sharpening the scissors are:
Wheels that fit Dremel
Sharpening stones
Best scissors are sharpener scissors. We will show you 9 quick ideas on how to sharpen scissors.
Stone Sharpening
Step # 1 Get in Sharpening Stone
You can buy sharpening stone at any hardware shops and can be used for any blade. Sharpening stones have frequently 2 sides: a rougher side and a fine side.
If your scissors are really dull, you ought to initially utilize a rougher side, and after that utilize a fine side to settle sharpening.
If you want a fine sharpening, you ought to just utilize a fine side of a stone.
Action # 2 Sharpening Stone Preparation
Put a towel beneath your sharpening stone and cream it with a developing oil or either water.
Finest oil for the sharpening stone is sharpening oil, but you can utilize any oil or water, it works good enough for lubing the stone.

Action # 3 Take Apart your Scissors
Eliminate the bolt that keeping your scissors blades together. You should do this so you can sharpen the blade independently, and have more movement when sharpening the blades.
Action # 4 Inner Side Sharpening
Put the inner side of the one blade on the stone facing down. Sharp angle between the cutting edge and the inner edge. The area where the 2 edges meet is the place needs to be sharp to cut things. Hold the deal with of the scissors blade, and gently drag the blade over the stone facing you, bring the edge of the blade versus the stone.
Do it once again well and gradually, as far as the blade has actually been sharpened. This requires about 5-15 pulls.
Perform this step with the other blades of the scissors.
Exercise with some old scissors till you are entirely competent for the sharpening the scissors.
Action # 5 Cutting Edge Sharpening
Keep your deal with of the scissors blade and lean the blade ahead of yourself while the innovative ordinary on the stone. Position the blade horizontal to you, slowly drag the blade over a stone in your direction, holding that chamfered edge flat vs. stone. Fit the angle and carry on moving the blade gradually. Rerun this operation specifically till the blade is sharpened.
Step # 6 Eliminate the Burrs
When you end with sharpening scissors, you'll notice specific rough burrs of metal across the sharpened edges of the blades. Burrs can rapidly be removed by setting the scissors back together, and opening and closing them a few times.
Check your scissors by cutting through some material like paper or fabric.
Step # 7 Tidy the Scissors
Use a paper towel to clean down the blades and wipe off any stone scraps that may have piled on the blades throughout sharpening.
How to Sharpen Scissors with a Dremel
Step # 1 Scissor Blades Separation
Take apart the two scissor blades. You can separate them by disconnecting a screw discovered in the middle of scissors.
Action # 2 Position of the Scissors
Put among the scissors blades into the vice with the sharp end turn outside. One side of the blade should be tilted down positioning in the sharp edge as at the same time the opposite will not be slanted. Setup the scissors, so that angled side faces upward.
Action # 3 Start a Dremel
Put the disc into a dremel and get started.
Action # 4 Keep the Angle
Control the dremel versus the top of the scissors blade at a 10 ° angle and abrasive
Step # 5 Grinding the Scissors
Continue rough along the length of the scissors at that angle as far as the whole edge is sharp.
Action # 6 Scissors Removing
Take out the scissor blade from the vise.
Step # 7 Repeat Steps
Carry out the steps from 2 to 5 again with the other scissor blade.
Action # 8 Scissors Mounting
Mounted the scissors blades by screwing them together again.
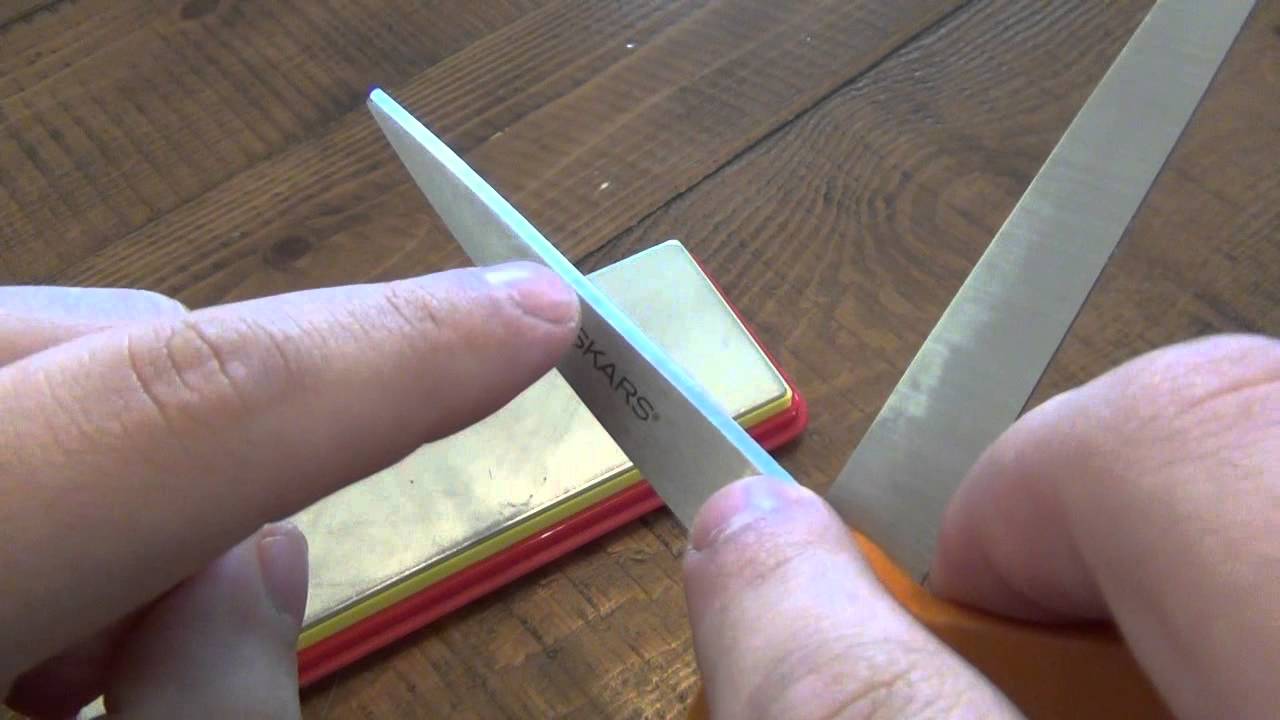
How to Sharpen Scissors with a File
Action # 1 Obtain a File
It's finest to utilize a medium file length for sharpening scissors. Since the scissors are little, and you do not require a huge file.
Action # 2 Prepare a File
Utilize a 10 inches file length.
Step # 3 Dismantle your Scissors
Remove the bolt that connects the scissor blades. Do this, so you can sharpen hair scissors each blade as soon as at a time, and have more flexibility while sharpening the blades.
Action # 4 Sharpening Scissors
Hold the file in one hand, and the scissors in the other hand and drag across the inner blade of the scissors, from the base of the blade up until reach the idea. Do it 5-10 times.
Repeat that action with the other blade.
Action # 5 Installed the Scissors
Screw the bolt in the middle of the hair scissors system that links blades.
Step # 6 Wipe the Blades
Take a paper towel and rub out any metal bits that appear on the blades during the sharpening with a file.
Sandpaper Scissors Sharpening
Action # 1 Acquire a Piece of Sandpaper
Use medium grit sandpaper if you want smooth edges of scissors. Bend your sandpaper fifty-fifty, with the rough sides turn outside. Have the rough edges end up, so the sandpaper scrapes over two blades while you cut the paper.
Action # 2 Cut Through the Paper
You require to cut through sandpaper, cutting long pieces, about 15 times. You'll see that blades end up being sharper with every piece you're cutting. Use entire strokes of the scissors, begin the cutting at the start of the scissors going up to the top.
Sandpaper cutting appropriates for scissors that aren't exceptionally dull but need a bit of sharpening scissors.
Sandpaper is likewise helpful for removing the cuts and kerfs.
Action # 3 Tidy Up the Scissor
Clean up the blades of the scissors utilizing a wet paper towel to get rid of any sandpaper scraps that may have appears on the blades during the sharpening.
How typically should hair scissors be sharpened?
We advise having any scissors that you utilize on a regular basis serviced a minimum of once a year. They require to be cleaned, set and balanced, even if they are still sharp within that year period. If you purchased poorer quality scissors, they may require to be sharpened as many as 4 times a year.
Scissors Sharpening with Aluminum Foil
Step # 1 Get the Foil
Use a little aluminum foil, about 10-15 inches long, and bend it in lengthways several times, so you have a folded and a tick foil.
Action # 2 Foil Cutting
Cut ribbons of the aluminum foil with your hair scissors up until you cut the entire of the thick aluminum ribbon. Start cutting at the base of the scissors and move it to the top.
According to the area of the ribbons that you cut, you can sharpen your blades a lot by cutting lots of small ribbons or a little by cutting several, thicker ribbons.
Action # 3 Scissors Cleansing
Utilize a paper towel get somewhat wet by warm water. This will rub out any aluminum stays that might have gathered to the blades throughout your cutting.Step # 1 Get the Foil
Utilize a little bit of aluminum foil, about 10-15 inches long, and bend it in lengthways numerous times, so you have a folded and a tick foil.
Step # 2 Foil Cutting
Cut ribbons of the aluminum foil with your scissors up until you cut the whole of the thick aluminum ribbon. Start cutting at the base of the scissors and move it to the top.
According to the location of the ribbons that you cut, you can sharpen your blades a lot by cutting lots of little ribbons or a little by cutting several, thicker ribbons.
Action # 3 Scissors Cleansing
Use a paper towel get somewhat wet by warm water. This will rub out any aluminum stays that might have gathered to the blades during your cutting.
Sharpening Scissors with a Sewing Pin
Step # 1 Purchase a Sewing Pin
You can buy a sewing pin on any store or order online.
Step # 2 Pin Cutting
Hold the scissors closed and pull the pin out far from the blades as the shears close. Use not such heavy pressure to close the scissors, permitting the stitching pin work sharpening for you. Do it a couple of times more, as far as the blades have a flat, sharp edge.
Action # 3 Tidy the Scissors

Use a wet paper towel and clean the scissor blades from any metal staying's that may get on the blades during the pin cutting.
Sharpening the Scissors Using Glass Jar
tep # 1 Position of the Scissor Blades
Spread out the scissors as much as you can, and set the blades around the glass container sides.
The glass jar must be at the position that it can go between two blades.
Keep the container in one hand, and the scissors in the other hand.
How do you test scissor sharpness?
Step 1: Utilizing the right thumb and middle (or ring) finger, make sure scissors are held like a surgeon. ...
Step 2: Cut through product utilizing 1/2 of blade to cut all the method through to the distal idea.
Action 3: After several cuts, extract scissors. ...
Step 4: The final test is how the scissors feel.
Action # 2 Cut the Jar
Hold the scissors closed and move the glass container out of the blades as the scissors close. Close the scissors with low pressure and the glass will sharpen for you.
Rerun the action up till you get a flat, smooth edge.
Step # 3 Tidy the Blades
Throughout the sharpening, many little glass parts might have collected on the blades while cutting the glass jar. Because of that, you must use a damp paper towel to clean up the scissor blades.
How to Sharpen Scissors with a Knife Sharpener & Special Scissor Sharpener
Sharpeners are much safer, and they are much more accessible for usage. It depends upon what kind of the scissors you have.
You can use a specifically created scissors sharpener or a knife sharpener.
Scissor sharpeners are great for usage due to the fact that it keeps the blade securely, and they can sharp the two blades instantly.
Knife sharpeners are good for sharpening because they can be utilized for a various type of blades.
Follow these few actions to find out how to sharpen scissors:
Take apart your scissors. Use the inner side of the blade and put in the knife sharpener. Drag the blade over a knife sharpener about 10 times. Repeat that process with the other blade. Do it until you get a sharp edge that you need.
Hold scissors and simply put them in the gap of the scissors sharpener system and press the clippers handles as you cut 10-15 times and you have a razor-sharp scissors.
Comments
Post a Comment